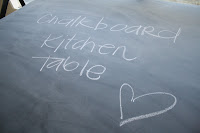
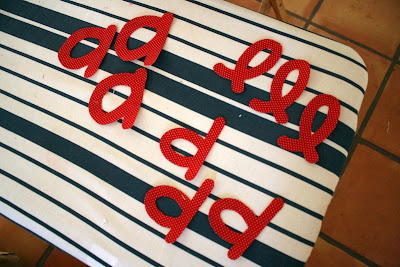
If you missed the first two parts of this series in which I did some really awesome things in my little kitchen, click on the photos below.
So, to top off my newly redone table, and to coordinate with with my made-over bookcase, I needed some placemats. Not just any placemats, monogrammed bunting placemats. And to go with my placemats, I needed some cloth napkins. Not just any cloth napkins, monogrammed flour sack napkins. Here's how I made both....
Supplies:
For the placemats (makes 4)
Cotton fabric, about a 1 yard (back fabric)
Cotton fabric, about half yard of each color (front fabric)
If you want all your placemats to be fronted in the same fabric,
then you would need 1 yard of the front fabric.
Fusible fleece, about 1 yard
Scrap fabric pieces (for the bunting design and monogram)
Heat-n-Bond, sewable
Thread, white and black
For the napkins (makes 8)
4 flour sacks (available in the kitchen department @ Target or Wal-Mart
Fabric scraps (for the monogram)
Heat-n-Bond, sewable
White thread
Red thread (or any contrasting color thread)
First, I chose my fabrics. I wanted one fabric (grey polka dot) for the back side, and 2 different colors for the front (2 yellow and 2 aqua). We only have 3 in our family, but I made four placemats so we have one for a guest. I made two yellow and two aqua, and all four are backed in grey polka dot.
I cut all 8 pieces (4 front, 4 back) into 19" x 13" rectangles. Using a half inch seam allowance on all sides, this will yield a finished placemat that measures approximately 18" x 12". If you want to adjust the size of your mats, go ahead. You can make them larger or smaller.
I don't have any photos showing this, but you will also need fusible fleece for padding the mats. The four pieces of fusible fleece should be cut one half inch shorter than your fabric on each side. So, if you use my measurements, your fleece would be 18" x 12".
Using the scrap fabric, cut out the triangles for the bunting and each monogram. I used 7 triangles for each mat. I used the Heat-n-Bond to adhere the triangles to the mat and then stitched around each with white thread.
I also adhered the monogram on each mat and stitched around the letter with white thread.
Then I used black thread to stitch across the mat, going over the top of each triangle. This was the string for the bunting banner.
Sorry, but I don't have any photos showing the rest of the process. Sad face.
Iron the fusible fleece (according to product instructions) to the wrong side of the back fabric.
Place front and back fabrics, right sides together and pin. Stitch around with a half inch seam allowance. Be sure to leave a 3-4 inch opening for turning. Turn mat right side out. Press. Stitch around entire mat, making sure to stitch the opening closed.
I also stitched three wavy lines (somewhat mimicking the banner's wave) to "quilt" the three layers together.
And now for the napkins....
I used some white flour sack towels from Target. They come in a pack of four for around $4. Each towel will yield 2 napkins.
I trimmed all the finished edges of the towel and cut it into fourths. You will have 16 squares that measure about 14" x 14".
I like the idea of unfinished edges, so that how I did mine, but if you want finished edges, you'll have to sew right sides together, and then turn it before top-stitching.
My kitchen has red in it, so I used red thread to top stitch around the napkin. You can use whatever fun contrasting color matches your kitchen, or use white! Put two squares together, there's not really a wrong or right side, and stitch around.
I did two laps around the square, so it looked like this.....
Using the Heat-n-Bond, iron the monogram on the napkin. Stitch around the letter with white thread.
Here's the finished napkin.
And the two beautiful pieces together....
And when we're not using them, the mats and napkins go into this cute little wire basket (found on sale at Wal-Mart) until the next meal. The can holds a few pieces of chalk and a rag for erasing our drawings on the chalkboard table. The mat under the basket (with the heart) is for a guest.
And there you have it. Three little projects that revamped my kitchen. I love them, and I hope you do, too.


No comments:
Post a Comment